Edible Gift Giving: Great Gifts Kids Can Make
Who doesn’t love homemade gifts, especially when they’re edible? Holiday music in the background, the family gathered around the kitchen table, and these recipes are all you need to create tasty traditions and memories that will last a lifetime.
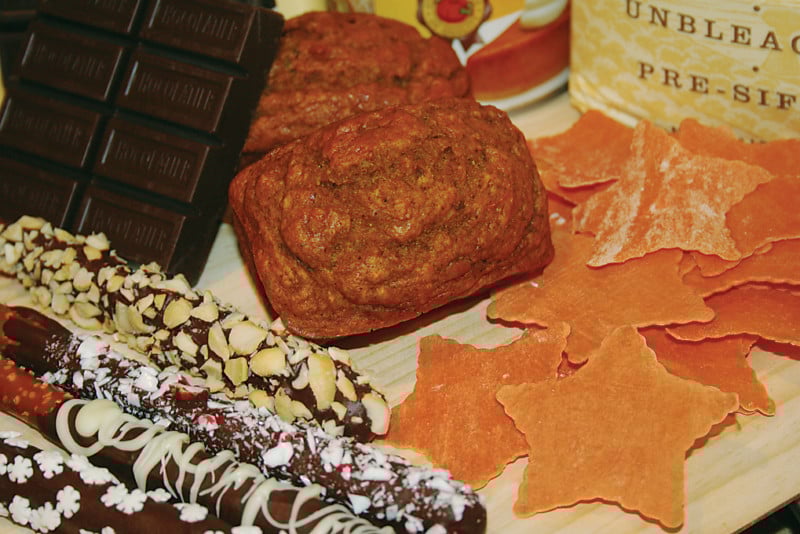
Chocolate-Dipped Pretzels
Salty and sweet come together with dark chocolate goodness in this recipe. Kids of all ages will have fun making these.
Ingredients:
- 1 bag of pretzel rods (the really long ones)
- 1 pound of good quality dark chocolate
- Wax paper
- Baking sheet/cookie sheet
Variety of items to decorate the chocolate dipped pretzels: crushed candy canes, sprinkles, chopped nuts, dried fruit, chopped candy bars, chopped cookies, mini-chocolate covered candies, etc.
Directions:
Step 1: Prepare Decorations
Place all the items you’ll be decorating the pretzels with in separate containers like pie plates.
Step 2: Melt Chocolate
Break up the chocolate into a microwave-safe bowl. Heat at 70% power for 60-120 seconds. Stir with a fork until smooth. Take care not to get any water in the chocolate or it will seize.
Step 3: Dip Pretzels
Grasp one end of the pretzel rod and drizzle chocolate with a spoon over the pretzel, turning as you go to coat all sides. You may need to spread the chocolate with the back of the spoon to get good coverage. Let the excess chocolate drip back into the bowl.
Step 4: Decorate
Hold the chocolate-covered pretzel over the pie plate containing the desired decorating ingredient. Sprinkle decoration over the pretzel, turning as you go to cover entire pretzel. Lay decorated pretzel on a baking sheet covered with wax paper. Continue with remaining pretzel rods.
Step 5: Cool and Package
Place baking sheet full of chocolate covered pretzel rods in the refrigerator until chocolate is completely set, about 30 minutes. Put pretzels in a plastic bag or other airtight container for gift-giving.
Fun Pretzel Fact: The largest pretzel ever made weighed 40 pounds and was 5 feet across. It was made by Joe Naccio of Federal Baking, Philadelphia, PA.
Pumpkin Spice Quick Bread
Moist and flavorful, this bread freezes well.
Ingredients:
- 2 cups unbleached all-purpose flour
- 1 tsp. baking soda
- 1 tsp. salt
- 1/2 tsp. baking powder
- 1 cup granulated sugar
- 1/4 cup canola oil
- 1/4 cup applesauce
- 2 large eggs, beaten
- 1 (15 ounce) can solid pack pumpkin
- 1/2 tsp. ground nutmeg
- 1/2 tsp. ground allspice
- 1 tsp. ground cinnamon
- 1/4 tsp. ground cloves
- 1/4 tsp. ground ginger
- 1/2 cup ginger ale
Directions:
Step 1: Prepare Pans
Preheat oven to 350° F. Grease 1 loaf pan, 8 mini-loaf pans, or 1 (12-count) muffin pan. Set aside.
Step 2: Combine Dry Ingredients
In a large mixing bowl combine flour, baking soda, salt, and baking powder. Set aside.
Step 3: Combine Wet Ingredients
In a large bowl combine the sugar, oil, applesauce, eggs, pumpkin, spices, and ginger ale. Mix together until well combined.
Step 4: Make Batter
Add the dry ingredients into the bowl containing the wet ingredients. Stir until just combined; don’t over-mix.
Step 5: Bake
Pour batter into the prepared pans. Place onto the center rack of the preheated oven. Bake for 50 minutes for a loaf (25 minutes for muffins or mini-loaves) or until a toothpick inserted into the center of a loaf comes out clean. Cool for 10 minutes; remove from pan and place on rack until cooled completely. Cover in plastic wrap.
Fun Pumpkin Fact: A pumpkin is a squash and comes from the same family as the cucumber.
Pasta Stars
Homemade pasta makes an especially nice addition to a “Taste of Italy” gift basket with olive oil, sun-dried tomatoes, olives, and other Italian delicacies.
Ingredients:
- 1 cup bread flour
- 1 egg at room temperature
- Dash salt
Directions:
Step 1: Make a Volcano
Make a pile with the flour on the work surface. With your fingers, dig a little crater in the middle so the pile looks like a little volcano.
Step 2: Add the Egg
Put the egg and salt into the crater. While using a fork to beat the egg, gradually add more and more flour into the mixture to form the dough.
Step 3: Knead the Dough
With the palms of your hands, knead the dough until it is no longer sticky. You may have to add more flour. When the dough is soft and smooth, it’s ready. Place dough in a zip top bag and let rest for 30 minutes.
Step 4: Roll Out the Dough
Dust your work surface with flour. Working with half of the dough at a time, use a rolling pin to roll it out into thin sheets. Keep in mind that when cooked, the pasta will be about twice as thick as it is before cooking.
Step 5: Cut Shapes
Cut out the dough using a small star cookie cutter. Any small shape will do. We’ve successfully used letters, gingerbread kids, and snowflakes.
Step 6: Dry Pasta
Lay cut pasta in a single layer on a clean bed sheet spread flat on a table. Depending on the thickness of the pasta and the humidity, it will take an hour or more to dry. Once dry, place in a plastic bag or other airtight container for gift-giving.
To change the color and flavor of the pasta, add a little vegetable puree to the egg. Tomato paste, carrot puree, beet puree, and spinach puree are all great choices. For quick pureed vegetables, jarred baby food works wonderfully. You’ll need to add a little more flour to compensate for the added liquid.
Pasta Fun Fact: According to the National Pasta Association, the average person in North America eats about 15 pounds of pasta per year.
Besides her two favorite jobs of wife and mom, Michelle Ann Anderson is also a freelance writer, enjoys public speaking, writing cookbooks and sharing her love of food with those around her. You can find her blog at MichelleAnnAnderson.com.