Melted Crayon Crafts: Two Easy Projects
I was browsing Valentine’s craft ideas, when I came across a crayon hearts tutorial. This inspired me to break out our box of old crayons and get crafting! I didn’t make crayon hearts, but am pretty proud of my crayon unicorns. I also tried, with growing success, melted crayon candles! Let me know in the comments if you’ve tried any of these projects, or if you have any other favorite melted crayon crafts.

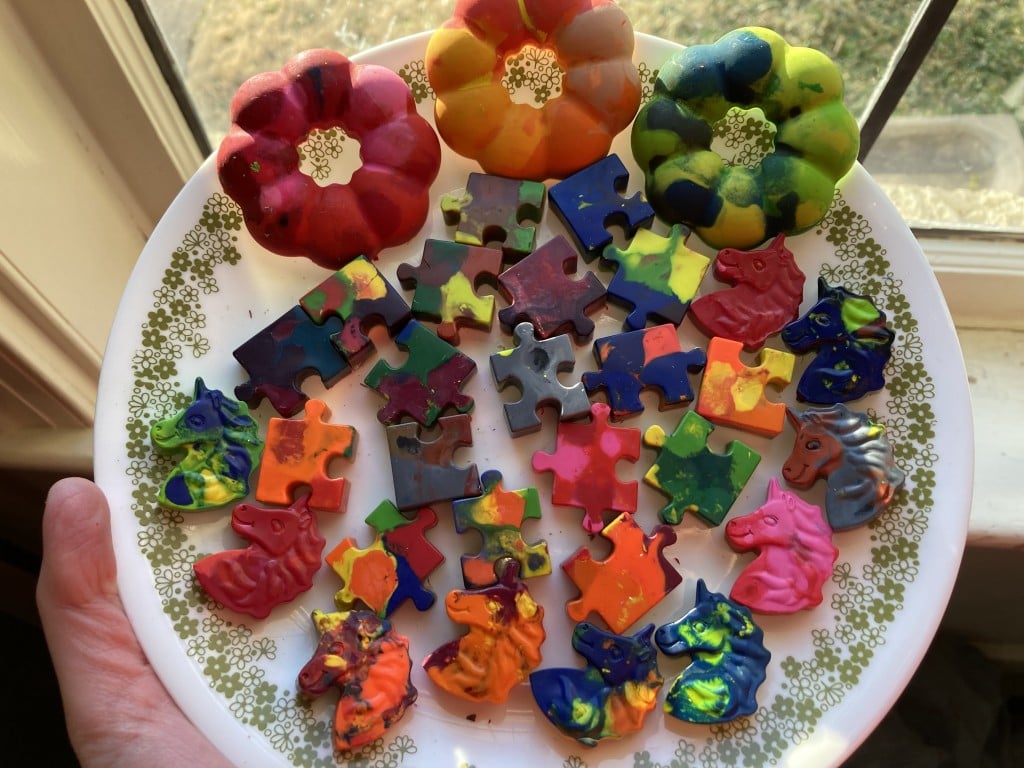
So many crayons! And several other boxes besides.
Melted, Molded Crayons
Not to be confused with melted, moldy crayons – yuck! For this tutorial, you need:
- Old crayons
- Silicone Mold – any shape will do
- Oven
Step 1:
Remove the wrappers from your crayons. Sort them by color, and chop them up into small, meltable bits.

Tip for peeling crayons: Use something to score the wrappers, so they come off easier! I used scissors, but be careful.

Maybe do not do this over carpet…
Step 2:
Arrange the pieces in your mold. Fill to the top, as there is enough air in between the pieces that the finished product will be shallower than your mold. Tip: Try to use complementary colors (if mixing colors) in case they melt/blend together.

Found these molds at Michaels for $5-$5.50 each. Lots of options.
Step 3:
Slide the mold onto a baking sheet. Bake at 275 degrees F. for about 10 minutes, or until all the crayon pieces have melted. The time really depends on the size of your mold AND the size of your crayon pieces.
Step 4:
When completely melted, remove from oven and let cool. Once cool, remove carefully from the mold. Ta-da!

Even though we did not end up with a heart-shaped mold, these would still be fun to give as Valentines!
Melted Crayon Candles
This project is a step up from the other in terms of monetary and time-investment. It also required a bit more trial and error on my part. But even when the candles didn’t turn out perfectly, it was still an interesting process.

The paper bowl was a mistake. I switched to the glass measuring jar shortly after this.
You Need:
- Soy wax flakes
- Wicks (with metal “feet”)
- Heat-proof glass jars, votive candle-sized
- Crayons
- Scent (optional – can use essential oils, I believe. I purchased some in the candle-making section at Michael’s.)
- Glass measuring cup
- Chopsticks or popsicles sticks, told hold wicks in place
Step 1:
Again, start by peeling, sorting, and chopping crayons. The soy wax flakes melt faster than crayons, so chop into fairly small pieces if you want them to melt at a similar rate, without getting the wax too hot.
Step 2:
Place about one full crayon into the bottom of your glass measuring up, along with 1.5-2 c. of soy wax flakes. Melt in the microwave, microwaving at about 30-second intervals, stirring occasionally. Once melted, add scent, if desired. You may need to experiment with this depending on the scent you’re using – maybe start with about 12 drops, and see what you think. An eyedropper or pipette would be helpful!

Found this at Ross for about $4, so I didn’t have to get my cooking one waxy. The handle got pretty hot, so use an oven mitt!
Step 3:
Pour a small amount of wax on the bottom of each glass jar, and secure the wick by pressing it into the melted glass. Let it dry a bit. Then, carefully fill with the rest of the wax, stopping about 1/2 inch from the top of the jar. According to letsmakecandles.com, the ideal wax-pouring temperature is between 120 and 140 degrees Fahrenheit. If your wax is too cold, it may crack. So using a thermometer might be a good idea.
Once you’ve poured the wax, use the popsicle sticks to hold the wick in the center of the candle. I liked using four altogether, so you could hem it in on all sides. Even then, the wicks were so long and my jars so small, it was hard to keep them in place. Eventually, I ended up cutting the wicks shorter and then trying to loop them over one of the popsicle sticks. This seemed to help.

I tried using skewers and chopsticks as well, but the popsicle sticks were definitely easiest to work with.

Step 4.
Let the candles cool! Trim wicks if needed. Feel free to add a cute label or ribbon to the jars, if you’re giving them as gifts!
Note for Layered Candles:
If you want to make layered candles, don’t pour the wax to the top. Keep your layers even by using tape or a dry erase marker to mark even layers on the outside of the jar. Let the candles rest about 30 minutes before pouring the next layer. And pour carefully! My first batch was very unsightly because I wasn’t using the glass measuring cup yet, so when I poured the wax, it got all over the inside of the candle, where it wasn’t supposed to. This kind of destroyed the layered look.

The ones on the right are my first batch. You can see the wicks are covered in red wax at the top, and the tops of the jars are a bit messy.

They look much nicer with lids on, though!
I’m not 100 percent satisfied with my process. The layers are a little wonky, and there’s some weird, white-ish sections in the wax. So the basic process of candle-making is fairly simple, but there are a lot of things you may want to tweak as you go along. It’s like a fun, scented science experiment! Here’s a Soy Wax Candle Troubleshooting Guide you may find useful!
Feel free to tag @tulsakids on Instagram if you try either of these! And remember – the wax is hot, so if you’re making these with kids, you probably want to handle that part!